
Did you know that more than 80 percent of London homeowners consider extending their homes instead of moving? Expanding your living space can transform daily life, add significant value, and let you craft a home that truly fits your family’s needs. With careful planning and the right steps, a home extension becomes less stressful and brings your dream closer to reality. Learn how each phase shapes a successful project from vision to completion.
Quick Summary
| Key Point | Explanation |
|---|---|
| 1. Clearly define project vision | Gather visual inspiration and list specific requirements to create a practical project blueprint early on. |
| 2. Verify planning permissions early | Consult local authorities to determine if your extension needs full planning permission or qualifies for Permitted Development rights. |
| 3. Choose experienced contractors | Research builders with relevant experience and ask for references to ensure quality and reliability for your project. |
| 4. Establish a realistic budget and timeline | Create a detailed budget with contingency funds and a reasonable timeline to manage expectations and avoid stress. |
| 5. Monitor construction quality closely | Regularly check progress and maintain communication with contractors to ensure the work aligns with your design specifications. |
Table of Contents
- Step 1: Assess Project Scope And Requirements
- Step 2: Secure Planning Permissions And Approvals
- Step 3: Select Experienced Contractors And Suppliers
- Step 4: Set Realistic Timelines And Budgets
- Step 5: Monitor Construction Progress And Quality
- Step 6: Finalise Inspections And Handover Procedures
Step 1: Assess project scope and requirements
Before diving into your London home extension, you need a crystal clear vision of what you want to achieve. This initial assessment stage sets the foundation for your entire project and helps translate your dreams into a practical blueprint.
Start by gathering visual inspiration that captures the aesthetic and functionality you desire. According to Love Renovate, this means considering elements like natural light, design style (modern or seamless), and collecting physical samples that communicate your vision effectively to architects and designers. Pull together photographs from magazines, Pinterest boards, or architectural websites that showcase spaces similar to your dream extension.
Next, begin mapping out your specific requirements. Ask yourself critical questions: What purpose will this new space serve? How will it improve your daily living? Are you looking to create an open plan kitchen, add a home office, or expand your living area? Your answers will guide every subsequent decision.
Engaging professional support early is crucial. According to The Page, early consultation with structural engineers and architectural professionals helps prepare detailed technical designs and verify project feasibility. Schedule initial consultations where you can articulate your lifestyle needs, budget constraints, and design preferences with absolute clarity.
Pro Tip: Create a physical mood board or digital presentation showcasing your design inspiration. This visual tool helps professionals understand your vision precisely.
As you wrap up this assessment phase, you will have transformed abstract ideas into a concrete project framework.
Your next step involves translating these initial concepts into formal architectural drawings and precise project specifications. Get ready to see your home transformation take shape.
Step 2: Secure planning permissions and approvals
With your project vision in place, the next critical step is navigating the legal landscape of planning permissions. This stage ensures your dream extension meets all local regulations and avoids potential legal complications down the line.
First, determine whether you need full planning permission or can proceed under Permitted Development rights. According to the Federation of Master Builders, this involves carefully checking specific criteria related to your property. Most home extensions can be completed under Permitted Development, which allows certain improvements without formal applications.
To clarify your specific situation, contact your local planning authority early. They can provide definitive guidance on whether your proposed extension requires a full planning application. Home Building UK emphasizes that properties in conservation areas or listed buildings face more stringent requirements and might need additional approvals.
For straightforward applications, you can typically submit your proposal through the official Planning Portal. Prepare comprehensive documentation including detailed architectural drawings, site plans, and a clear description of your proposed work. This helps streamline the review process and demonstrates your commitment to following local regulations.
Pro Tip: Always check size restrictions and boundary limitations before finalizing your designs. Some Permitted Development rights have specific measurements that cannot be exceeded.
Be aware that breaching planning regulations can result in enforcement actions or mandatory retrospective applications. These can be costly and time consuming. Taking the time to understand and comply with local guidelines protects your investment and prevents future headaches.
As you complete this permissions stage, you are one step closer to transforming your home. Your next phase will involve detailed architectural drawings and technical specifications that bring your extension vision to life.
Step 3: Select experienced contractors and suppliers
With planning permissions secured, your next crucial task is assembling the right team to bring your extension vision to life. Choosing experienced contractors and suppliers can make the difference between a smooth project and a potential nightmare.
Begin by thoroughly researching potential builders. According to The Page, look for professionals with strong portfolios that demonstrate relevant experience in home extensions. Pay close attention to their communication skills and reputation in the industry. Consider reaching out to architectural technicians who might offer more cost-effective alternatives to traditional architects while still delivering high-quality design work.
Dive deep into their previous projects and ask for comprehensive references. Look for contractors who have completed similar extensions in London neighbourhoods with architectural styles comparable to your home. Request to see detailed photographs of completed work and speak with past clients about their experience.
Materials selection is equally critical. According to Urbanist Architecture, choosing materials that complement your existing property and neighbourhood context is paramount. Poorly selected materials can lead to aesthetic mismatches and long-term maintenance challenges. Discuss material options that not only look great but also integrate seamlessly with your current home’s architectural style.
Pro Tip: Always request multiple quotes and compare them carefully. The cheapest option is rarely the best value for a complex home extension project.
Ensure that any contractors you consider are fully licensed, carry appropriate insurance, and can provide clear timelines and detailed cost breakdowns. A professional team will be transparent about potential challenges and work collaboratively to address them.
As you complete this selection process, you are setting the foundation for a successful extension project. Your next step involves finalizing contracts and establishing clear communication protocols with your chosen team.
Step 4: Set realistic timelines and budgets
Now that you have selected your contractors, it is time to get practical about the financial and temporal realities of your home extension project. Setting realistic budgets and timelines will help you manage expectations and avoid unexpected stress.
Start by understanding the true cost of your extension. According to Home Building UK, online cost calculators can provide initial estimates based on factors like size, materials, and regional build costs. However, these are just starting points. Consult our detailed extension project timeline checklist to get a more comprehensive view of potential expenses and timeframes.
Love Renovate suggests allowing 6 to 9 months from your initial decision to the actual build completion. This timeline accounts for planning, design refinements, permissions, and potential unexpected delays. Consider seasonal timing as well summer months often provide more stable construction conditions and potentially faster progress.
Budget carefully and include a contingency fund of at least 10 to 15 percent. Construction projects invariably encounter unexpected challenges, and having financial breathing room prevents major setbacks. Break down your budget into clear categories materials, labour, permits, design fees and track expenses meticulously.
Pro Tip: Always get detailed written quotes from contractors and compare them line by line. Hidden costs can quickly derail your financial planning.
Think about your living arrangements during the extension. Will you need to move out temporarily? Factor these potential accommodation costs into your overall budget. Some extensions might require you to create alternative living spaces within your home or seek temporary housing.
As you finalize your timeline and budget, you are transforming your extension from a dream into a structured plan. Your next step involves preparing detailed contracts and establishing clear communication protocols with your chosen team.
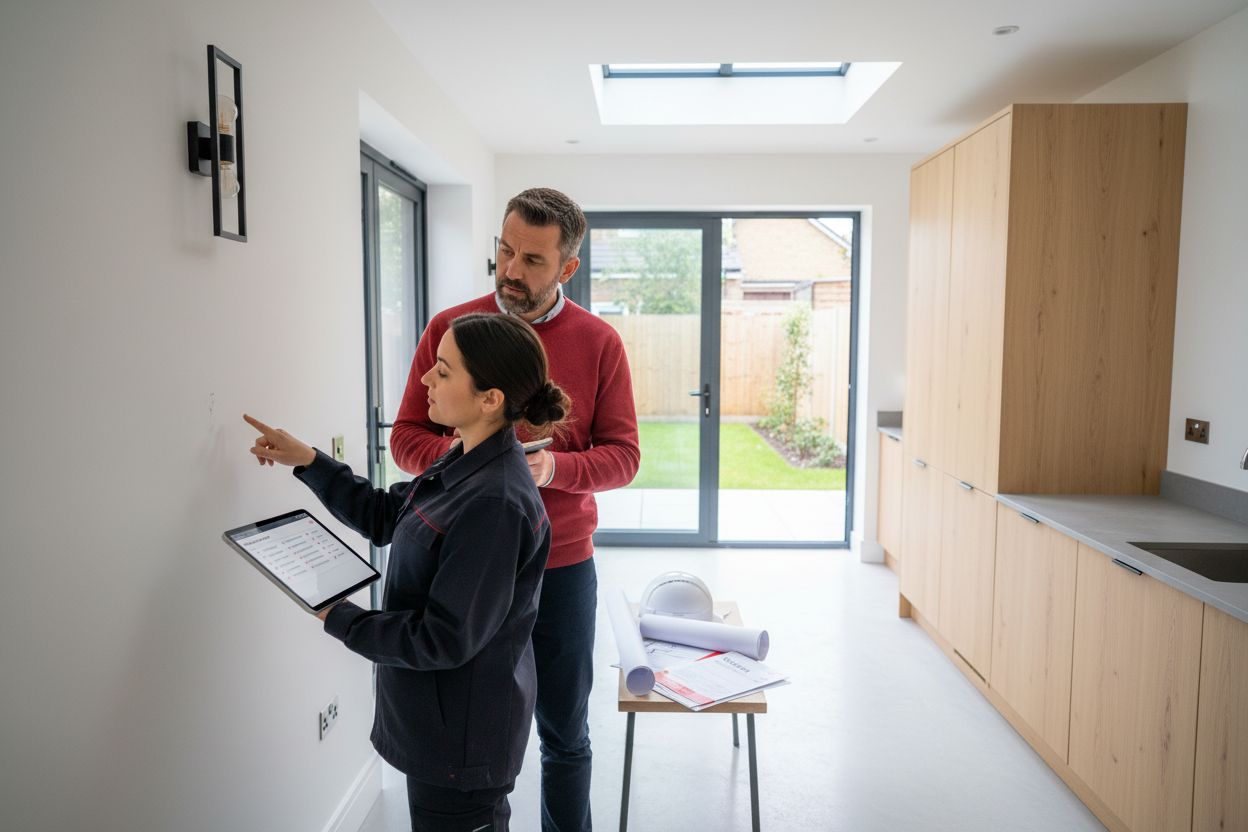
Step 5: Monitor construction progress and quality
With your budget and timeline established, your role shifts to active project management. Monitoring construction progress and maintaining high quality standards is crucial to ensuring your extension meets your expectations.
According to Home Building UK, tracking your project requires a comprehensive approach that covers multiple stages. From pre-commencement conditions through to the final weathertight structure, you will want to establish a detailed tracking system. Regular site visits are essential. Schedule weekly walkthroughs with your primary contractor to review progress, discuss any emerging challenges, and confirm work aligns with original design specifications.
During different construction phases pay attention to specific milestones. The first fix stage involves electrical and plumbing rough ins, while the second fix focuses on fitting fixtures and completing interior elements. Use our extension project timeline checklist to understand what to expect at each stage and maintain clear communication with your contractors.
As you approach completion, the snagging process becomes critical. According to Self Build, this involves systematically identifying and documenting any finish level defects. Create a comprehensive checklist that covers every detail from paintwork quality to electrical socket alignment. Be meticulous but fair in your assessments.
Pro Tip: Photograph each stage of construction. These visual records can help resolve any disputes and provide a clear progression timeline.
Consider holding back a final payment percentage until all identified issues are resolved. This provides motivation for contractors to complete work to your exact specifications. Professional builders understand this is standard practice and should not take offense.
As you complete this monitoring phase, you are transforming your extension from blueprints to reality. Your next step involves preparing for the final inspection and planning your exciting move into the newly created space.
Step 6: Finalise inspections and handover procedures
You are approaching the most exciting stage of your home extension project: the final inspection and handover. This critical phase transforms your months of planning and construction into a completed living space ready for you to enjoy.
Start by scheduling a comprehensive professional inspection. According to professional handover experts, this process involves creating a detailed report documenting both internal and external quality aspects of your extension. Refer to our extension project timeline checklist to understand the specific elements that should be examined during this final review.
During the inspection, walk through every inch of your new space with your contractor and a neutral third party if possible. Check for any remaining defects or areas requiring additional work. Pay close attention to finishing details such as paintwork, electrical connections, plumbing fixtures, and structural alignments. Be thorough but also reasonable in your expectations.
Prepare a comprehensive snagging list that meticulously documents any issues discovered during the inspection. This list will serve as your official record of items that need addressing before final handover. Prioritize these items based on their significance and potential impact on the overall functionality of your extension.
Pro Tip: Request that all snagging items be rectified within a specific timeframe and document these agreements in writing.
Before making final payment, ensure all contractual obligations have been met. This includes obtaining necessary certificates such as building regulation completion documents, electrical safety certificates, and any required warranties. These documents are crucial for future property valuations and potential sales.
As you complete this final stage, you are moments away from fully enjoying your transformed living space. Your next steps involve moving in and beginning to create new memories in your beautifully extended home.
Here’s an overview of each home extension project phase:
![]()
| Step | Purpose | Key Actions |
|---|---|---|
| Assess Project Scope | Define vision & requirements | Gather inspiration Identify needs Consult professionals |
| Secure Permissions | Ensure legal compliance | Check requirements Submit application Prepare documentation |
| Select Contractors | Assemble project team | Research builders Check references Request quotes |
| Set Timelines & Budgets | Manage expectations & costs | Estimate costs Plan duration Include contingency |
| Monitor Progress | Maintain quality & track build | Site visits Milestone checks Snagging process |
| Finalise Handover | Ensure completion & compliance | Final inspection Snag list Obtain certificates |
Take the Stress Out of Managing Your London Extension
Struggling to keep your extension project on track and within budget? Many London homeowners face the same challenges, from dealing with complex planning permissions to choosing reliable contractors and setting realistic project timelines. The article above highlights how delays, unexpected costs, and quality concerns can quickly become overwhelming without expert support. If you want peace of mind and a smooth transition from vision to reality, expert project management services for home extensions are essential.
Reltic Extend have over 20 years of experience delivering bespoke extensions in London and Surrey. We handle everything from transparent stage-based costing and permissions to build oversight and final snagging, so you do not have to worry about a thing. Ready to turn your ideas into a stunning, hassle-free home transformation? Visit our contact page and let’s help you get started today. Your dream extension—and a stress-free journey—are just a click away.
Frequently Asked Questions
How do I assess the scope of my home extension project?
Start by defining your vision and specific requirements for the extension. Gather visual inspiration and create a mood board to communicate your design preferences effectively.
What are the key steps to secure planning permissions for my extension?
Determine if you need full planning permission or can use Permitted Development rights for your extension. Contact your local planning authority to clarify your specific requirements and prepare necessary documentation.
How can I choose the right contractors for my extension project?
Research potential builders by reviewing their portfolios and checking references. Look for professionals with experience in home extensions similar to yours, and request detailed quotes to compare their services.
What kind of budget should I prepare for a home extension?
Set a realistic budget based on initial cost estimates and include a contingency fund of 10-15% to manage unforeseen expenses. Break down your budget into categories, such as materials and labor, to keep track of your spending.
How often should I monitor construction progress during my home extension?
Schedule regular site visits at least once a week to review the progress and address any challenges with your contractor. Keep a detailed tracking system, focusing on specific milestones to ensure everything aligns with your plans.
What should I do during the final inspection of my extension?
Conduct a thorough walk-through with your contractor to identify any issues that need correcting, creating a snagging list that documents necessary repairs. Ensure all contractual obligations are met before making the final payment.
Recommended
- How to Plan a Home Extension for London Homes – Reltic Extend
- Understanding Home Extension Project Management Clearly – Reltic Extend
- Master Your Extension Project Management Workflow Efficiently – Reltic Extend
- 7 Essential Home Extension Design Tips for Londoners – Reltic Extend
- How to Hire a Renovation Contractor for Quality Results – Astrotech Construction
- Elevate Your Home with Shutter Installation Project Management


